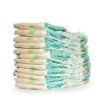
Diapering a baby can get expensive. So why not try cloth? Cloth Diapers can get really expensive and all the choices out there can overwhelm you. So why not save money since that is one of the reasons you decided to cloth diaper anyway, and make your own with what you have around the house. Using old clothes or sheets and towels will not only save you money but it makes the cutest diapers.
Advertisement
Supplies Needed:
sewing machine
old t-shirt and/or flannel shirt or sheets
shower curtain or plastic pants
elastic (bathing suit kind is best)
1" or 1 1/2" Sew on Hook and Loop tape or diaper pins
diaper pattern
Instructions:
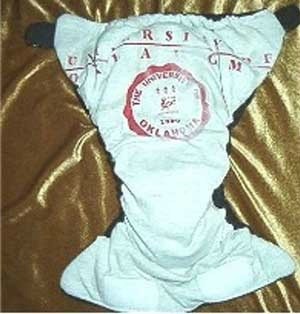
First you will need to find or create a diaper pattern. There are many great free cloth diaper patterns available on the web. Just do a search for "free cloth diaper pattern" or "free diaper pattern" and find the one that you like the best. I recommend the one by Ottobre (http://www.ottobredesign.com/en/print/pdf/vaippa_en.pdf).
Once you have the diaper pattern then you need to decide if you want to make a waterproof (this is called an All-In-One, AIO) or if you want to use plastic pants over your cloth diaper. An AIO has a water proof barrier in the middle (the shower curtain in this case) that makes it work like a regular diaper. Make sure that all of your materials have been washed and dried and are ready to use.
Advertisement
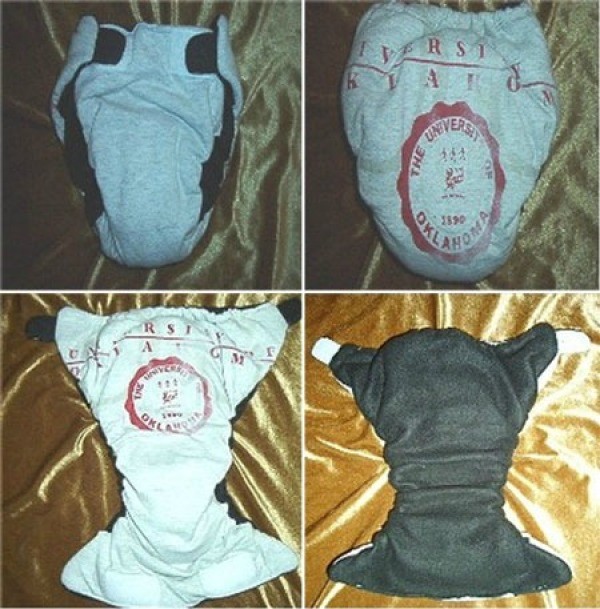
Lay out your shirt or sheets and pin your pattern to the fabric. You will need three layers, an outer layer, and inner layer, and if you are making an AIO a water proof barrier layer.
Next cut your inner soakers out of your towel. Cut two to six 5" by 10" rectangles. The number of layers you need depends on the thickness of the towel. You don't want it to be bulky.
Sew the soaker layers together with a simple straight stitch around the outside edges and one seam right down the middle. Then pin the soaker to the wrong side of the lining fabric. Sew it to the middle of the diaper. Make sure that you are about 3" from the front edge of the fabric. If you get to close you will make it to bulky and hard to sew your hook and loop closure to the fabric.
Next you will want to go ahead and sew your hook and loop closures to the outer and inner pieces of fabric. Take the outer fabric pattern piece and cut a piece of "loop" (the soft stuff) about 6". You can make it longer or shorter depending on what you want. Pin this to the right side of the outer fabric about 2" from the front top of the fabric and sew using your favorite stitch.
Advertisement
Then cut two 1' squares of Hook (the rough stuff) and pin these to the right side of the inner layer on the tabs. You will want to pin them as close to the seam allowance as possible. Again use your favorite stitch to attach the "hook".
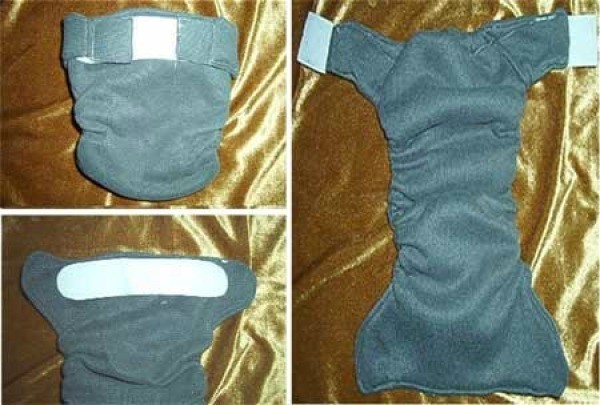
Now place all the layers together in with right side together. Make sure that the inner and outer layers are right side together and then the water proof layer is on the outside. This way when you turn the diaper after sewing it will be in the middle. Sew around the diaper making sure to leave a 3" or 4" opening on the front of the diaper for turning. Don't use the back seam to turn you will not be able to attach your elastic.
Now it is time to sew the elastic into place. For the back of you diaper cut an 8" piece of elastic. Start sewing your back elastic about 1" from the end of the tab to the back seam. Now cut two leg pieces of elastic. You will want these to be about 7" or 8" each. Sew the leg elastic to the side seams starting the elastic close to the front top and end it at the back curve. This will give you the best fit and helps keep messes in. Make sure you use an elastic stitch and that you are pulling the elastic tight from both ends the whole time you are sewing it on.
Advertisement
Now it is time to turn your diaper right side out. You may want to trim and notch the edges to make turning easier. After you have turned your diaper and checked to make sure that all edges are sewn together you will need to top stitch the front. You can to stitch the whole diaper if you like. This will give it a professional look and make it lay a little better. However you do not need to this to the whole diaper.
Now your diaper is ready to use. When you wash your diapers do a rinse cycle and then wash and rinse again using the hottest water setting possible. Do not wash your diapers with your regular laundry and never ever use fabric softener. This makes them lose their absorbency. You can either hang them up to dry or through them in the drier. AIO will do better air drying.
 Diapering a baby can get expensive. So why not try cloth? Cloth Diapers can get really expensive and all the choices out there can overwhelm you. So why not save money since that is one of the reasons you decided to cloth diaper anyway, and make your own with what you have around the house. Using old clothes or sheets and towels will not only save you money but it makes the cutest diapers.