I had so much trouble locating directions on the internet for making a "solo" cup light ball that I just created my own free website that gives easy to follow step-by-step instructions. I call them sparkleballs. These balls cost under $10 to make (if the season is right for buying Christmas mini-lights) and they can be used to decorate showers, weddings, parties, teen's rooms; as well as at Christmas.
Advertisement
I know of one family who is making them to raise money for a friend's heart transplant. So, I don't own this idea. I just decided to provide as much information on the how-to of it as I can as a small public service. These balls have given me so much joy, I just wanted to share. Every craft website I visit has people looking for the directions, so here you go!
My website is http://www.sparkleball.com (it has lots of photos). Once again, I earn nothing from this. It is all free and in the spirit of thrifty crafting. If you'd like to share a photo of your creation, please let me know. I'm just a fanatic, fascinated by this American craft. Thanks for sharing!
Sparkleball Lady from San Diego, CA
Editor's Note: This looked so easy and pretty that we decided to make one for the site. It took about an hour but the next ones will go faster. The cups cost about $5.00 for 2 packs of 40 (you need 50), but you could probably get them in bulk for cheaper. We had the lights on hand but basic 100 strand light strings are usually only a dollar or two. We also needed to buy a cheap soldering iron, which was $8.00, but you might have one already.
Advertisement
The instructions on the site are detailed and have step by step photos. Here are a couple of helpful hints that we figured out along the way:
Make your center holes slightly larger than you need to thread one light through. This will hold the lights in place better.
If you hold the cups together for a second or two, they stick together better. It gets easier as you go.
When you do the second row of 9, place three cups symmetrically first and then melt the rest into place. This will keep it even all the way around.
When you get to the top 4 cups, place all of them in together and then hold them in place as you melt them together. Otherwise, the last one can be tricky to fit into place.
The burning plastic isn't too stinky but a mask is helpful to avoid breathing the fumes.
When you are inserting the lights in a "zigzag pattern", it is necessary to go along the outer row a couple of times. We found it easiest to go straight down to the middle four and then fill out the rest of it.
Advertisement
Don't be surprised if your "100 light" strand only has 99 lights. Just leave one cup with only one light.
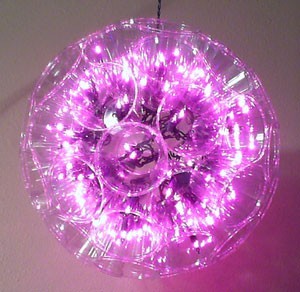
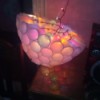
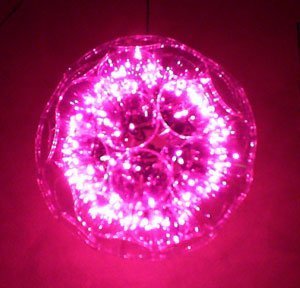
That's it, they are very sparkly and impressive when completed. The finished light is about the size of a small beach ball (about 13 inches in diameter). The lower photo is with the lights on, so you can see more detail.
 I had so much trouble locating directions on the internet for making a "solo" cup light ball that I just created my own free website that gives easy to follow step-by-step instructions. I call them sparkleballs. These balls cost under $10 to make (if the season is right for buying Christmas mini-lights) and they can be used to decorate showers, weddings, parties, teen's rooms; as well as at Christmas.