Planting bulbs is relatively straightforward. Dig a hole, drop in a bulb, and cover it with dirt. Well, at least it's almost that easy. To get them off to a good start, follow these bulb-planting tips:
Advertisement
Using the Right Tools
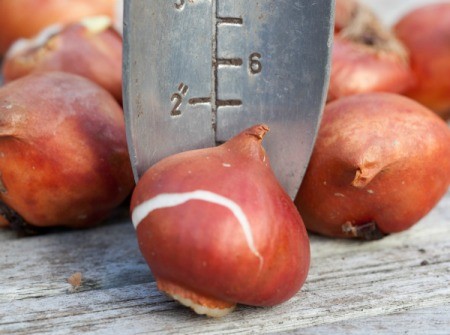
The Trowel: Easily the most popular all around tool with gardeners, a trowel is also a great tool for planting bulbs, especially if you have several types of different bulbs that require different planting depths. Choose a trowel that has depth measurements marked down the length of the blade.
The Bulb Planter: This cylindrical hand-held tool is designed specifically for planting bulbs. Simply push it into the ground and pop out a soil core. Bulb planters come in handy if you're doing a large planting, but they are difficult to use in compacted soils. Most have depth measurements stamped on the side of the cylinder.
The Dibber (also called the dibble): The beauty of the dibber lies in its simplicity. Shaped like a carrot, it's only job is to poke holes in the dirt. A dibber is a great choice for planting small bulbs but can be difficult to use in compacted soils.
Advertisement
When to Plant
Ideally, bulbs should be planted as soon as possible after you purchase them, although some bulbs (tulips, crocus, and narcissus) can be stored in a cool, dry place for a time before planting. In general, planting times are based on bloom times. Spring-blooming bulbs require a period of cold dormancy to bloom and must be planted in the fall. Many summer and fall blooming bulbs can survive cold temperatures and need to be planted in the spring.
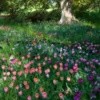
Spring and Summer Blooming Bulbs to Plant in the Autumn
crocus (Crocus)
crown imperial (Fritillaria imperialis)
daffodil (Narcissus)
glory-of-the-snow (Chionodoxa)
grape hyacinth (Muscari)
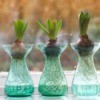
hyacinth (Hyacinthus orientalis)
lily (Lilium)
ornamental onion (Allium)
Siberian squill (Scilla siberica)
snowdrop (Galanthus)
Advertisement
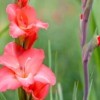
tulip (Tulipa)
windflower (Anemone blanda)
Summer Blooming Bulbs to Plant in the Spring
caladium (Caladium bicolor)
calla (Zantedeschia)
canna (Canna xgeneralis)
crocosmia Crocosmia)
dahlia (Dahlia)
elephant's ear (Alocasia and Colocasia)
lily-of-the-Nile (Agapanthus)
tiger flower (Tigridia pavonia)
tuberose begonia (Begonia xtuberhydrida)
How Deep to Plant
The depth of the hole will vary according to the type of bulb your are planting, so check with your vendor for exact instructions. Generally, larger bulbs (tulips, narcissus, and hyacinth) are planted to a depth of two or three times their height. In sandy soils, they can be planted slightly deeper than the recommended depth. In heavy soils, they can be planted slightly closer to the surface. Small bulbs are generally planted at a depth equal to their own height.
Advertisement
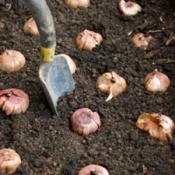
5 Steps to Planting
Prepare the Soil: Whether you're planting bulbs in containers or in beds, most prefer well draining soil. If necessary, amend heavy soils with sand or compost, and toss in a handful of bone meal before planting. Ideally, soil should be prepared at least one week out from planting.
Dig the Hole: Arrange your bulbs on top of the prepared soil to mark the each spot where you want a dig hole. The depth of the hole will depend on the bulb, but it should be at least twice its diameter. The bottom of the hole should be flat and roomy enough so that the bulb does not touch either side of the hole. Try to keep the sides of the hole vertical. Avoid digging your hole in the shape of an ice cream cone.
Place the bulb in the hole: Set the bulb down into the bottom of the hole so it's facing right side up (roots on bottom). Twist it gently so the basil plate of the bulb makes contact with the soil.
Advertisement
Replace the Soil: Cover the hole with dirt and press it down gently.
Mark the spot: Bulbs leave no above-ground evidence of their planting location, so mark the area with a plant label.
Protecting Your Bulbs from Animals
Cover the ground over your bulbs with chicken wire or hardware cloth after planting. (Use bricks to secure). Make sure to removed the wire after the ground is frozen, or in early spring when stems start to peek through the ground. Sprinkling coarse gravel or non-clumping kitty litter into the planting can also help deter rodents from digging. Avoid using straw to mulch around your bulbs. It's an attractive winter bedding that only encourages rodent activity near your bulbs.
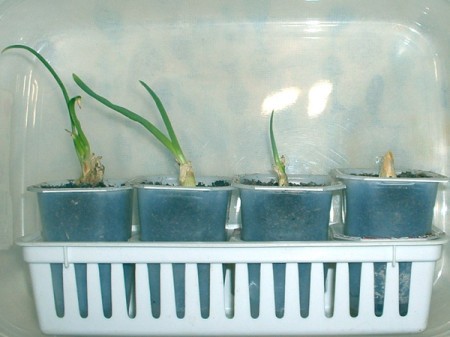
When planting your spring bulbs it's almost impossible to remember exactly where you planted them. Buy a box of straws and stick them in the soil above the bulbs, leave 2" showing above the soil. I planted pink straws with my tulips, yellow straws with my daffodils and so on.
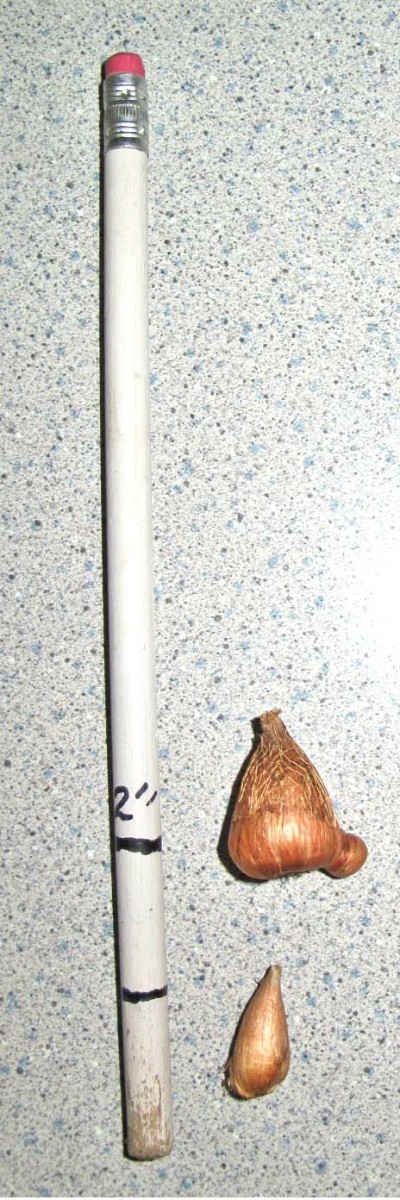
For years, I have used this pencil for measuring the depth to plant small bulbs like these freesias. The tiny ones need to go in 1 inch and the larger ones at 2 inches.
If you have different varieties and colors of flowering bulb, make stakes out of old miniblinds and write the color and type on the stake. It is always harder to remember the type and color after they bloom.
Don't plant your spring blooming bulbs until after the the 2nd frost in your area otherwise they might try to bloom in late fall and you could mess up their cycle.
I live in zone 9 and really want to grow callas. Can I start them indoors to get a good start now (January 1) for spring planting? We get a few days of freezing and have already lost quite a few bulbs planted outside in summer.
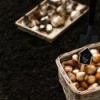
Bulbs are a wonderful addition to your landscape, they will multiply and provide beautiful colors, shapes, and fragrances in your garden for years to come. Planting dozens of bulbs can seem a bit overwhelming at first. Read the following article for tips on buying and planting bulbs.
This is a page about digging up and storing tender bulbs. While some plants that grow from bulbs, corms, or tubers do well in colder zones during the spring and summer, they may need to be overwintered to save them for next year.
 Planting bulbs is relatively straightforward. Dig a hole, drop in a bulb, and cover it with dirt. Well, at least it's almost that easy. To get them off to a good start, follow these bulb-planting tips: