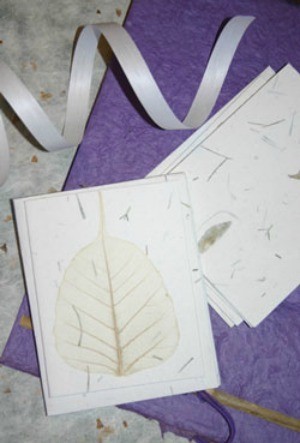
 Making handmade plantable paper is a beautiful way to share the beauty and bounty of your flower and vegetable garden with fellow gardeners, while recycling paper into garden compost. You can modify the following directions to create inexpensive ornaments, invitations and note cards-or whatever your creative imagination can dream up!
This recipe assumes your paper will end up planted, and avoids the use of chemicals, inks and dyes that can be harmful to growing plants and the environment. Different papers will produce different effects so have fun experimenting with colors, textures and weight.
Good Paper Choices:
- unprinted computer paper
- newspaper (usually printed with soy inks-will cause grayish color)
- magazines (avoid high-gloss)
- egg cartons
- toilet paper
- paper bags (grocery store bags)
- non waxed boxes (require pre-soaking in water)
- office paper/junk mail
- tissue paper
- napkins
- construction paper
- old greeting cards
- phone book pages
Other Supplies:
- blender or food processor
- sponge
- wooden or plastic frame (old picture frames work well)
- screen or cheesecloth (window and door screen works best)
- staples or tacks (for tacking screen to frame)
- small plastic washtub or basin (large enough to immerse frame in)
- turkey-baster
- several squares of felt (white, not colored), flannel or old dishtowels (larger than frame)
- cookie sheets or newspapers (for stacking paper on to dry)
Directions:
- Tear paper into nickel-sized pieces, or use a paper shredder and place in blender (to half full). Make sure to remove any staples! You can also add bits of hemp or other natural fibers that may be safely composted once planted. Fill the blender with warm water. Blend for about 60 seconds on low to medium speed. Continue to increase the speed until no paper flakes remain and pulp appears smooth.
- Now make a mold by tightly tacking screen or mesh onto a frame of the desired size.
- Fill the washtub about half full of water and pour in pulp from blender. Add in at least 3 blender loads of paper-more if desired (the more pulp, the thicker the paper). Add in flower or vegetable seeds. Small, flat seeds like, forget-me-not, hollyhock, chili pepper and tomato seeds work wonderfully. Stir the mixture.
- Slip the frame into the washtub, gently moving it from side to side to get the pulp around to the top of the frame level and to the desired thickness. Let the layer of pulp settle and slowly lift the frame up so it is above water level. Let it drain for a moment and check to see if it is level. Fill the turkey-baster with pulp from the washtub and use it to fill in any uneven spots or gaps in the pulp.
- After removing the frame from the water, let it drain. When it stops dripping, carefully lay the frame (pulp side down) onto a fabric square or an old dishcloth. Use the sponge to press out as much water as possible (wring excess water back into tub).
- This step may take some practice to master so be patient. Holding the fabric square flat, slowly lift up and remove the frame. The wet paper should remain on the fabric. If the paper sticks to the screen, you may have pulled too fast or not pressed enough water out of the paper. Once you successfully remove the frame, gently smooth out any noticeable air bubbles or rough edges.
- Keep repeating steps 4-6 and stack the fabric squares (or dish towels) on a cookie sheet. When finished, place a piece of cardboard on top of the last piece and use bricks or another cookie sheet to press out the remaining water in the stack.
- Gently separate sheets and dry them on a clothesline or out in the sun for 12-24 hours. When they are dry, gently separate the paper from the fabric squares (or dish towels).
For great gifts, use cookie cutters or stencils to trace holiday shapes. Cut them out and attach a ribbon for thoughtful gifts that last beyond the holiday season. Other uses for home made paper include scrapbooks, stationary and note cards, journal or photo album covers, lampshades, etc.
Don't Forget the Instructions for Planting
Tear off bits of paper containing seed and plant directly in the ground-the paper will compost naturally. To pre-sprout the seeds, place dampened paper into a plastic bag and check periodically that paper remains moist. Keep the plastic bag at the appropriate temperature until seeds sprout and transplant them into pots or directly into the garden.
Comments
Read More Comments Making handmade plantable paper is a beautiful way to share the beauty and bounty of your flower and vegetable garden with fellow gardeners, while recycling paper into garden compost. You can modify the following directions to create inexpensive ornaments, invitations and note cards-or whatever your creative imagination can dream up!