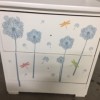
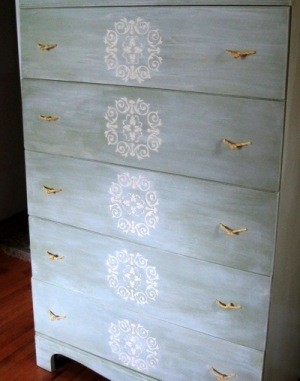
This is a chest of drawers I painted and stenciled for my sewing room.
Approximate Time: 4 hours not counting drying time
Supplies:
chest of drawers
Advertisement
primer paint
green paint or color of choice
brush
glaze
ivory paint
clothesline rope
sandpaper
newspaper
stencil
joint compound or Spackle
flat putty knife
gold paint or color of choice for stencil
Instructions:
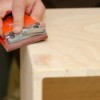
First I washed the chest well and then I sanded lightly to remove the shine. I then primed the whole chest with a latex primer. At this point you might want to number your drawers because sometimes even though they look the same size, they are not. I found out that the hard way.
After thoroughly drying, paint the chest the color of your choice. I painted mine a grassy green to go with the rest of the room. You might need two coats if your coverage is not good with the first one.
Next, I did the stencil in the middle of the drawer. You can either use paint for this or if you have a thicker stencil, you can use the joint compound or Spackle to apply over the stencil. This raises it, and gives dimension to your project. When using this stencil, after applying the compound, immediately lift the stencil and wash it off so it is clean for the next drawer.
Advertisement
After allowing to dry, about 4 hours, you are ready to paint it. Place stencil back on the dried compound and paint it, being careful not to get any under the stencil. Do each drawer and allow to dry. If you have a hard time getting the paint off your stencil, use denatured alcohol.
For top coat: Mix 2 parts ivory paint with 2 parts glaze OR you can use water instead of glaze, but you have longer working time with the glaze. To glaze, dip just the tip of your brush in the ivory mixture and brush some off on newspaper. Then lightly brush over the grass green paint and over the stencil. Remember that you do not need much paint, you just want to lightly touch and glide across. Let the glaze application dry.
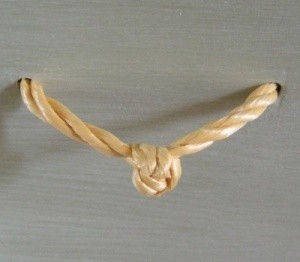
Make handles by using clothesline rope. Cut off a length that is long enough to make a square knot in the middle and long enough to insert through both holes where the former handles were.
Advertisement
NOTE: Before cutting, put Scotch tape around where you will cut or it will fray out. You will be tying them together in the back of the face of the drawer so you will need a good length. Test one out for length before cutting all of them. I bought this rope at the $1 store so needless to say, it was a very economical way to replace the handles. This was a fun project. I had the paint already so I just paid $15 for the chest and $1 for the rope, very economical project.
 This is a chest of drawers I painted and stenciled for my sewing room.