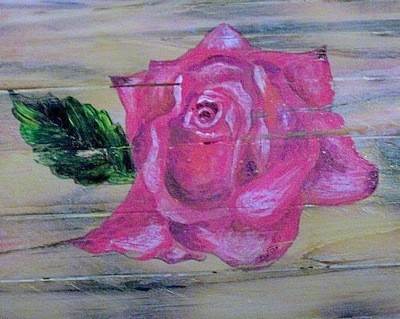
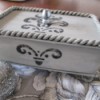
By using paint techniques and a heat gun, give an ordinary wooden jewelry box an antique look.
Approximate Time: 2 hours
Supplies:
wooden box, available at most craft shops
Advertisement
It need not be made of an expensive or very durable type of wood. The one shown in the example was made from inexpensive pine wood.
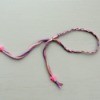
pink felt
any type of fast drying glue suitable for use on wood
heat gun
a thin paint brush
fine sanding paper
acrylic paint in several colors
It will be used to paint a flower design on the lid. In the example a rose design was painted, but any other design will be suitable.
HB pencil to sketch the design on the wood before painting it
1 old rag for final painting technique
turpentine
two colors of acrylic paint for the final painting technique ~ in the example gold and light pink were used
furniture oil
Instructions:
Sandpaper the whole box thoroughly inside and out.
Burn the outside of the box, as well as the lid, with the heat gun. Also burn the inside of the lid. Be careful not to linger for too long on any one place with the heat gun, or to bring the heat gun too near the wood, this will cause damage to the wood.
Advertisement
Once again sandpaper the whole box. The grain and the knots of the wood will now appear darker than the rest.
Draw a flower design on the lid of the box.
Paint the design with the acrylic paint.
Allow the paint to dry thoroughly.
Crumple up the old rag, wet it in the turpentine and then dip it into the gold paint. Then make light circular movements with the rag over the box, so that gold paint will be applied unevenly all over the box.
Dip the rag into the turpentine again and then wipe off some of the gold paint. Concentrate on the areas where one would expect wear and tear to take place in the everyday handling of the box. This will give the box a weathered look.
Repeat steps 7 and 8 with the pink paint. Allow to dry thoroughly.
Paint a border design and allow to dry.
Use the sandpaper again and sand away some of the paint on the places where one can expect the box to be touched during everyday use. Also lightly sand the border design and the floral design to add to the weathered look.
Advertisement
Cover the inside of the box with felt. Make sure that the felt is glued thoroughly to all the edges and corners.
Lightly rub furniture oil on the whole outside of the box.
I'm already starting a bit of my Christmas shopping for this year, and for my younger girls I was wanting to give them a small jewelry box and some jewelry. I could, of course, go out and buy a cheap jewelry box, but I'd rather get them something more personalized.
Are there any other readers that have made jewelry boxes themselves that I could get some suggestions from, or maybe a website that could help me?
I have made several for friends from plastic canvas. I am very bad at regular sewing, but find plastic canvas very easy to do. You can make the size you want, in the person's favorite color
Advertisement
and use a nice design for the outside, or even the person's name on the lid.
You can make sections in shapes and sizes for rings, bracelets, earrings, pins, and whatever else. You can make a deep box, make the section dividers half the depth, and place a lift out top section, also divided.
You could buy a blank wood box from the craft store and decoupage it with things your girls love or paint it in their favorite color and add stickers. The ideas a limitless. Good luck.
Tina
By Lynne (Guest Post)
December 30, 20080 found this helpful
Best Answer
I didn't see your question until today, but I collect used jewelry boxes from my local Goodwill. They are cheap and many are well-made.
Advertisement
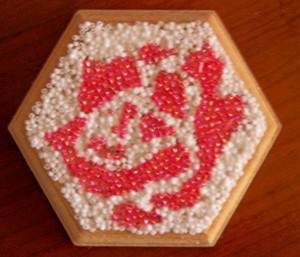
They can be sanded, painted, decoupaged, beaded, and personalized for very little investment.
I'm already starting a bit of my Christmas shopping for this year, and for the younger girls I was wanting to give them a small jewelry box and some jewelry. I could, of course, go out and buy a cheap jewelry box, but I'd rather get them something more personalized. Are there any other readers that have made jewelry boxes themselves that I could get some suggestions from, or maybe a website that could help me? Thanks!
Get on the web and look under crafts. I am an avid rubber stamper and I have made many cool crafts (including jewelry boxes) by finishing unfinshed, wooden boxes with a combination of sealers, rubber stamps and embossing powders and sometimes Chinese papers. It really depends on what you want to do. PSX (Personal Stamp Exchange) has some of the coolest progects in their catalogue.
With the help of simple, easily obtainable materials, and with a little ingenuity, a small, ordinary little box can be transformed into a quite presentable jewelry-box.
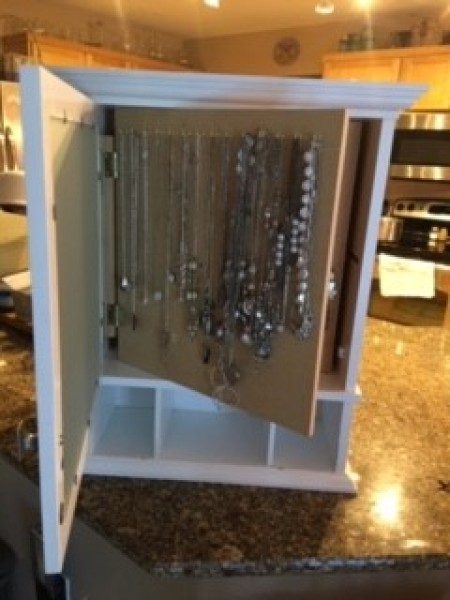
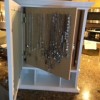
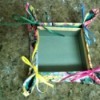
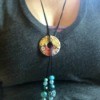
My daughter has a huge collection of necklaces. We've tried various ways of organizing them and then came up with this customized jewelry cupboard which stores 50 necklaces.
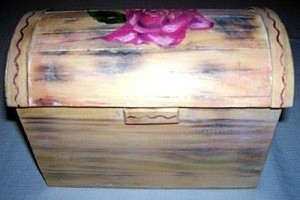 By using paint techniques and a heat gun, give an ordinary wooden jewelry box an antique look.